

Creating an ERC-20 Token
If you came here directly and you’re new to smart contracts, check out the previous post first which has an introduction to the basic concepts and sample code to deploy and run.
So far we’ve discussed how to write a smart contract. Which is cool! But now you want to be the next million trading your own token on Uniswap, huh? Well, this article is a pretty good guide on getting there and we’re going to go over a lot of stuff they’ve packed into that piece and more, including a piece on how to provide liquidity for your new token!
What is an ERC-20?
There are various standards in Ethereum which developers can use to, you guessed it, standardize on. Creating tokens is a lot easier and have less friction if we all agree that a common token’s scaffolding and basic features should look like this and operate in this way, while leaving the rest of the details up to the team to do, experiment and innovate (or not) on. This in turn helped enable the explosion of ERC-20 tokens over the last few years as the barrier to entry for creating you own coin, no miners or nodes necessary, was made lower and therefore easier to launch new projects. There’s also ERC-721 tokens which are the standard for NFTs and so on.
So, to be the ERC-20 standard token (or token standard, rather) needs meet a criteria and be able to do a handful of things, including transfer tokens to an address, from an address to another address and return address balances.
These are implemented as functions in the code, that’s why you see token’s like HEX have functions such as these. While the HEX Platform is not open source, all contracts running on the blockchain are by nature open source as you can see here.
Making a Token
Now, instead of going full easy mode the whole time with the Remix IDE as we did in the last post for creating a simple smart contract, we’re going to go easy mode v2.0 and use both Remix and OpenZeppelin. We’ll use OZ’s web-based wizard to generate a contract and get that into Remix to finish developing and then deploy our new ERC-20 on an Ethereum Testnet.
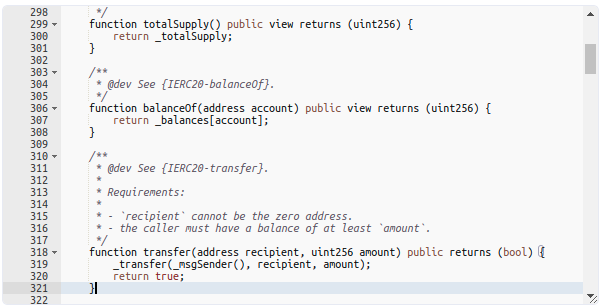
What is OpenZeppelin? It’s a popular crypto library that makes it easy to create contracts that are more secure and less complex than they’d be if you wrote them from scratch. It automatically implements all of the necessary ERC-20 functions like approve(), balanceOf(), totalSupply() and others and lets you focus on making the token do the things you want to it do without worrying about all the boilplate code that would be necessary writing it from scratch.
Note: although, you should look at any contract’s code on Etherscan to get an idea of how the stuff works under the hood of course! it’s just not a requirement for a simple token as we’re creating today.
If you get confused at any point in time, check out this video as this blog is based on a lot of the content the gentlemen goes through on it. Credit to Crypto Scraper for his 5min walkthrough! Also, this article has a ton of technical details to help explain things.
So let’s get started! Go to the OpenZeppelin ERC-20 wizard here.
The token we’ll be creating is called HeartCoin (HRC). It won’t do much, nothing really at all, in fact, as this guide is just showing you how to create and deploy a token on Ethereum and not discussing any real features, product-market fit or game theory. We’ll save the brain power in case we want to make a token that has purpose and a platform later on.

We can see that HRC will mint and therefore have a total supply of 1,000,000,000 coins in honor of our favorite billionaire.
Note: this coin has nothing to do with RH and is only a fun example coin, but we’re still going to make it live on an Ethereum Testnet as a proof of concept for this post.
Then, if you click Open in Remix it will send the code over to our browser-based IDE where we will once again (see previous blog post) get access to deployment options.
Deploying it on Testnet
Assuming you have installed and know how to use Metamask, go to a Testnet faucet such as the one Metamask provides.
One you’re there, open up Metamask itself and click the drop down where it lets you select a network, with the selection by default being Ethereum Mainnet. Once you open that drop down, click Show/hide test networks and flip the Show test networks option from OFF to ON. Then go back to the network selection drop down and pick a testnet… let’s go with Ropsten Test Network for this one as it’s compatible by default with the Metamask Faucet. Once you do that, the fault page should have a green button that says request 1 ether from faucet. Click it and then check your wallet in a minute or so to see you have 1 ether there now, yay! Free testnet money (that we’re going to spend to deploy the token contract)!
Now, we’re going to connect Metamask with Remix by changing our ENVIRONMENT to Injected Web3. Once connected, it should show Ropsten network under the ENVIRONMENT field.
We want to Compile the code, select heartcoin-…sol from the Contract dropdown and then go to bottom Deployment & run transactions tab and click Deploy.
Note: by default, the ERC-20 openzeppelin contract is selected on the Contract field, so make sure the heartcoin contract is there instead or else deployment won’t work.
When you’re ready, hit Deploy and once Metamask prompts you, Confirm. Once the transaction confirms, our token will be live!
Now we can check the Etherscan (testnet) confirmation URL to view the details.
Yay, we have a billion HRC in our wallet! We can check Metamask to confirm by adding the contract address. If we add the token to our wallet via Import tokens -> insert token address (symbol / decimals should fill automatically) we can see that all the tokens went into the wallet that deployed the contract, which is ours.

Liquidity Providing
So we can trade it, I guess, if we put up liquidity on a DEX like Uniswap?
Go to Uniswap and click the Pool tab, then in Select Pair, do ETH and HRC (paste in the contract address and it will show up, then Import), select a fee tier and then we’ll just do 1,000,000 (HRC per 1 ETH) for a starting price and just setup the price ranges accordingly, at least where the starting price is in between the min and the max (again, this is just a test so the values don’t have to make a lot of market sense). Then go to Deposit Amounts and deposit some ETH and HRC, approve HRC with Metamask, click Preview then Add and away we go!

Now let’s trade’em!

Conclusion
There you have it. Creating an ERC-20 token is easier than you thought, huh?
So what can we do with this token?
You know, not a lot. But that’s a lot of tokens, right? You can buy them, hold them and sell them. Hope they go up in value, but often times it’s just a lot of Hopium for a short period of time. That doesn’t make Crypto as a whole a stupid, beanie baby play for investors anymore than buying shares in any business, product or idea anywhere does. You look for gems and sometimes you find them and make money. Some investments offer more benefits to their investors than others in every industry.
It does, however, take more than “making a billion coins” to have utility and provide value for the market to be interested in it and while we could have deployed it on Ethereum (mainnet), there wouldn’t be much of a point. There’s no platform, no stake.heartcoin.xyz to lock tokens up and earn yield (like hex.com does masterfully), its just a contract that creates a token and mints a billion coins. We could put up liquidity on Uniswap for it for laughs, but keep in mind this is just a test coin. Good practice though and maybe we’ll even see HeartCoin on PulseChain testnet in the future!
Of course it takes more than just minting coins with a simple contract to get people to adopt it and be a successful project… unless we get a bunch of heart surgeons betting on a new memecoin available on Testnet! Meh, there’s way better projects and people to invest in.
Now you can go tell your friends you know how to make a token!